Business Projects, DIY Arts & Crafts Projects, Royal Brites® Projects, School Projects
How to Make a Foam Board Castle: A Simple DIY Guide
How to Make a Foam Board Castle: A Simple DIY Guide
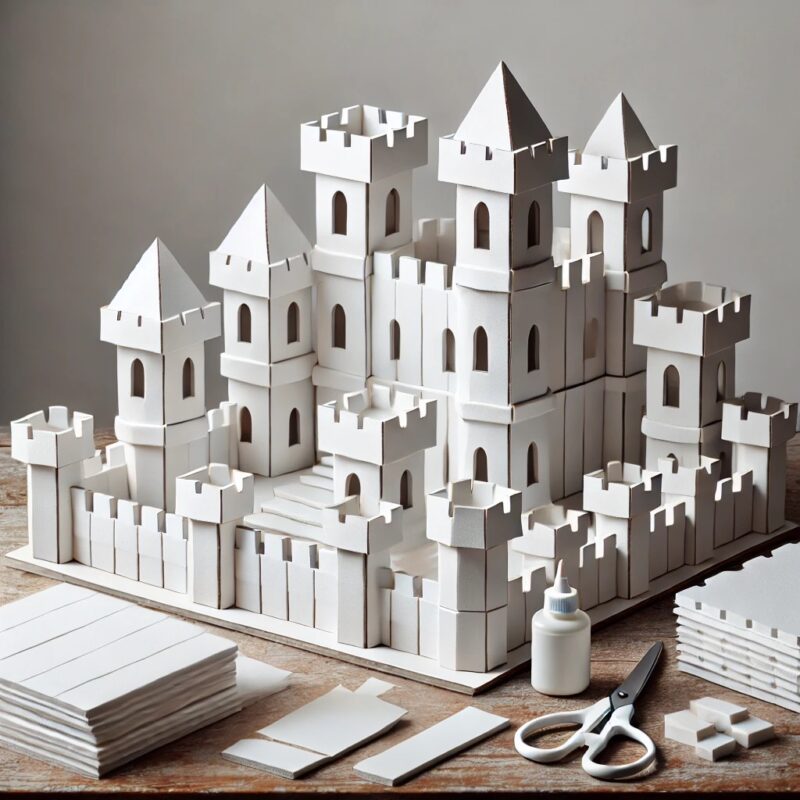
If you’re looking for a fun craft project to get stuck into, building a foam board castle might be just the thing! Whether you’re making it for a school project, for kids to play with, or simply because castles are cool (and they are), this is a satisfying and creative way to spend a weekend. Plus, it’s easier than you might think—you just need a bit of patience and the right materials.
Here’s how I made this castle, step by step:
What You’ll Need
Here’s everything I used for my castle. You might already have some of these lying around the house:
- Foam board: This is the main material for the walls and towers.
- Glue: I used craft glue, but a hot glue gun works great too (just be careful with it!).
- Scissors and a craft knife: You’ll need scissors for general cutting and a craft knife for details.
- Ruler and pencil: For straight lines and marking your pieces.
- Paint or markers (optional): To add color or texture.
- Extras: Anything fun you want to add—flags, glitter, little figurines, whatever inspires you!

Step 1: Imagine Your Castle
Start by picturing what your Foam Board Castle will look like. Will it have tall towers? A big drawbridge? Lots of battlements (those little square teeth along the top of walls)? Don’t stress about making it fancy—just sketch a quick idea to guide your build. Keeping the design simple, like using square or flat roofs instead of curved ones, can make the process easier while still looking impressive. You can always add fun details later to bring your Foam Board Castle to life!
Step 2: Cut Out the Pieces for Your Foam Board Castle
This part takes a little time, but it’s the foundation of your project, so take it slow and enjoy the process.
1.The Base:
Start with a sturdy base – Use foam board to serve as the foundation for your castle.
2.The Walls:
Cut long rectangles for the outer walls. Decide how tall you want your castle to be, then measure and cut accordingly.
If you want windows, cut small rectangular openings in the walls before assembling.
3.The Towers:
For square towers, first cut rectangles and glue them together into a box shape; furthermore, enhance their appearance by adding battlements, which can be created by cutting small notches along the tops of the towers.
4.The Gate:
Choose one wall of your Foam Board Castle to serve as the main gate; additionally, this will be the focal point of your design, adding both functionality and visual appeal. Cut out a large arch or rectangle to create the entrance. For an extra touch of fun, you can add a drawbridge by attaching a small foam board piece with a strip of tape, allowing it to flip up and down—an optional but exciting feature!
Step 3: Assemble Your Castle
Now it’s time to see it all come together! Here’s how I did it:
1.Attach the Walls:
Glue the walls to the base, making sure they line up neatly. Don’t worry if the edges aren’t perfect—this is a castle, not a science experiment.
2.Add the Towers:
Place the towers at the corners of the walls or wherever you want them. Use plenty of glue to make sure they stay in place.
3.Details:
Add the battlements along the tops of the walls and towers; furthermore, these details enhance the design, making your Foam Board Castle look impressively authentic.
Tip: Hold each piece in place for a few seconds after gluing to let it stick properly. Foam Board Castle can be a bit stubborn at first!
Step 4: Let It Dry and Enjoy!
Once everything is glued and decorated, give it a good hour or two to fully dry. Then it’s ready to display, play with, or even gift to someone who loves castles as much as you do.
Building this foam board castle was not only a fun but also a highly satisfying project; moreover, I truly hope you enjoy creating your own just as much as I did! Whether you keep it simple or go all out with decorations, your castle will be uniquely yours. Share your creations—I’d love to see what you come up with. Happy crafting!
Customize Foam Board like a Pro with Iclicknprint Free Poster Board Layering Tools.

 .
.